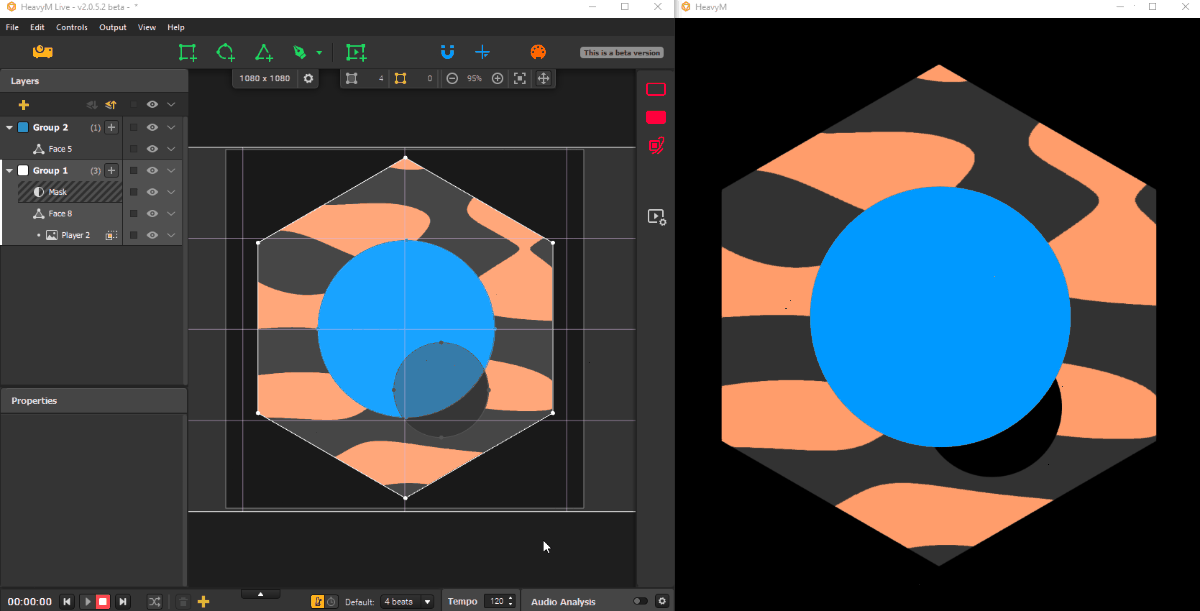
Masks are shapes that allow you to hide a particular part of the output or even make hollow shapes.
Indeed, a mask affects the group it belongs to, so if you overlap faces from the same group and put a mask in it, you'll just see black where the mask is. However, if you place faces from another group below, you'll be able to see through the face from the group with the mask!
Note
masks are not affected by group effects, and any overflow from their group will not be displayed inside them. However, they can be affected by output effects.
Creating Masks
To make a mask, simply draw a face wherever you want, select it, and click on the "Use as Mask" option from the right-click menu or the associated options menu in the layers panel.
Note
You can't directly draw a mask; you always have to draw a face first.
Editing Masks
To turn a mask back into a face, select it and click on the "Unmask" option from the right-click menu or the associated options menu in the layers panel.
Creating Masks
To make a mask, simply draw a face wherever you want, select it, and click on the "Use as Mask" option from the right-click menu or the associated options menu in the layers panel.
Note You can't directly draw a mask; you always have to draw a face first.
Editing Masks
To turn a mask back into a face, select it and click on the "Unmask" option from the right-click menu or the associated options menu in the layers panel.
Was this article helpful?
That’s Great!
Thank you for your feedback
Sorry! We couldn't be helpful
Thank you for your feedback
Feedback sent
We appreciate your effort and will try to fix the article