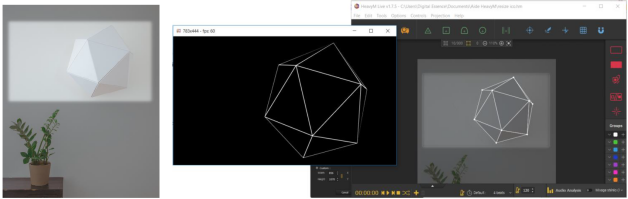
You can import an image as your canvas background to worki remotely. This is especially useful for projector setups: take a photo of your structure from the projector’s position, then use it as a reference to place shapes accurately—all without being on-site.
Displaying the Background
To enable the background display, go to View → Show Image. A default image will appear in your workspace. Untick the option to hide it.
Note
The background image is for creation only and won’t appear in your final projection. To include an image in your projection, use a media player.
Background Settings
To use your own image (instead of the default), follow these steps:
- Go to View → Image Settings...to open the configuration window.
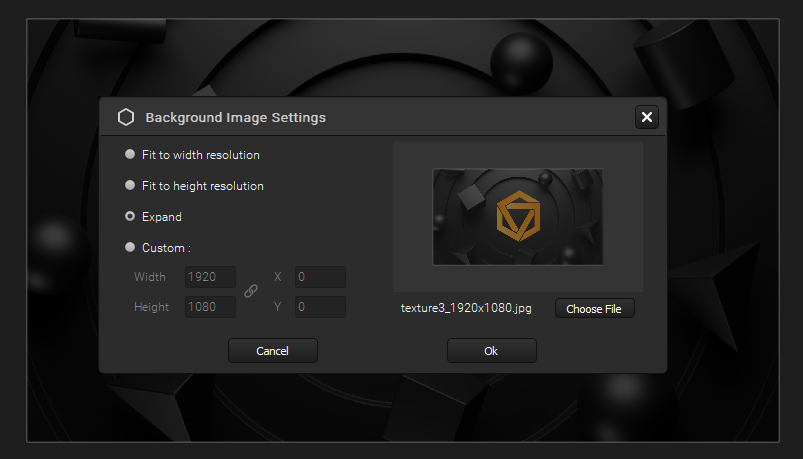
- Click "Choose file" to select an image from your computer. Supported formats: .JPEG/.JPG, .PNG (with transparency), and .BMP.
The filename and preview will appear once selected.
- Adjust the image display using these options:
- Fit to width resolution: Scales the image to match the canvas width (aspect ratio preserved).
- Fit to height resolution: Scales the image to match the canvas height (aspect ratio preserved).
- Expand: Stretches the image to fill the entire canvas (ignores aspect ratio).
- Custom: Manually set width, height, and position (X/Y coordinates). Click the
 button to disable aspect ratio locking.
Note: Custom sizes won’t auto-adjust if the canvas resolution changes.
- Click "OK" to apply changes or "Cancel" to discard.
Was this article helpful?
That’s Great!
Thank you for your feedback
Sorry! We couldn't be helpful
Thank you for your feedback
Feedback sent
We appreciate your effort and will try to fix the article