The MicroPlayer mkIII is a standalone audio player supporting WAV and MP3 files stored on an SD card or USB drive. Files can be played automatically at power-up or triggered by external events (input contacts, RS-232 commands, infrared remote control).
TABLE DES MATIÈRES
Front Panels and Connectors

1. Volume knob for the amplified speaker output | 8. USB 2.0 host connector for USB drive, Type-A |
| 2. Configurable button A (decreases volume by default) | 9. RS-232 serial connection and power output, detachable terminal block |
| 3. Configurable button B (increases volume by default) | 10. 4 optocoupled input contacts and power output, detachable terminal block |
| 4. SD card slot | 11. 2 MOSFET outputs and power output, detachable terminal block |
| 5. Status LED | 12. Stereo audio output at line level 0 dBu, RCA connectors |
| 6. Infrared sensor | 13. Stereo amplified speaker audio output, Class D, detachable terminal blocks |
7. External DC power connector | 14. Stereo headphone audio output, standard 3.5 mm jack connector (TRS) |
First Use
The MicroPlayer mkIII is factory-configured with default settings, and the player should work as soon as a prepared media is inserted. (See Operating Mode)
Note: Before inserting an SD/SDHC card or USB drive, ensure the player is powered off.
Insert a prepared SD/SDHC card or USB drive
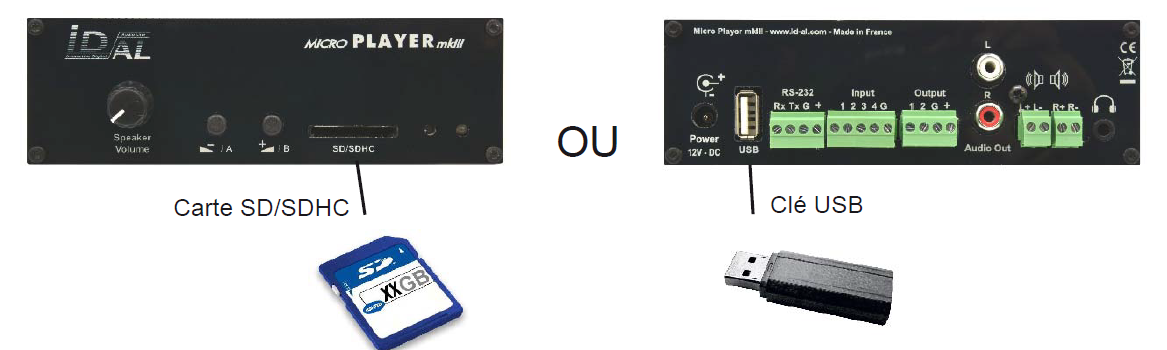
- Memory card: Select a high-quality SD/SDHC card. Insert the card into its slot until it clicks into place without forcing. To remove it, press the card lightly to unlock it.
- USB connector: You can plug a USB memory drive into this port.
Note: If an SD/SDHC card and a USB drive are connected simultaneously, the SD card will take priority, and the USB drive will not be used.
Connect speakers, headphones, or a sound system to the audio output and power on the player by inserting the power cable.
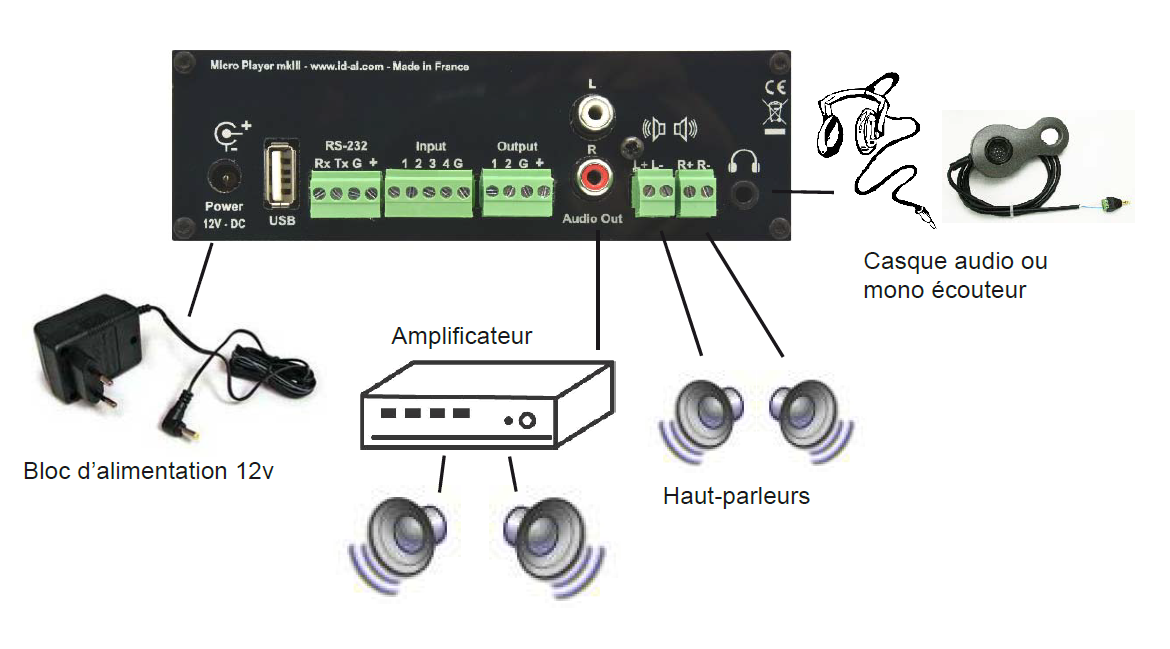 Power Supply
We recommend using the power supply provided with the player. If you need to power the player from another power supply or battery, you must respect the recommended voltage of 12V DC, although the player can operate between 10V and 15V. The current consumption depends on the amplifier's power level.
Media Preparation
New SD/SDHC cards or USB drives are generally already formatted as FAT or FAT32. However, it is recommended to reformat your SD/SDHC card or USB drive. Select the FAT or FAT32 format depending on the memory size. (FAT32 for capacities above 512MB)
Other formatting types will not work.
If you are using a Windows PC, the latest versions do not allow formatting large-capacity media (>32GB) as FAT32. In this case, you must obtain a formatting utility.
Connections
Input Connections
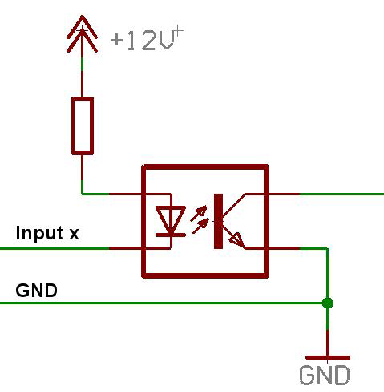
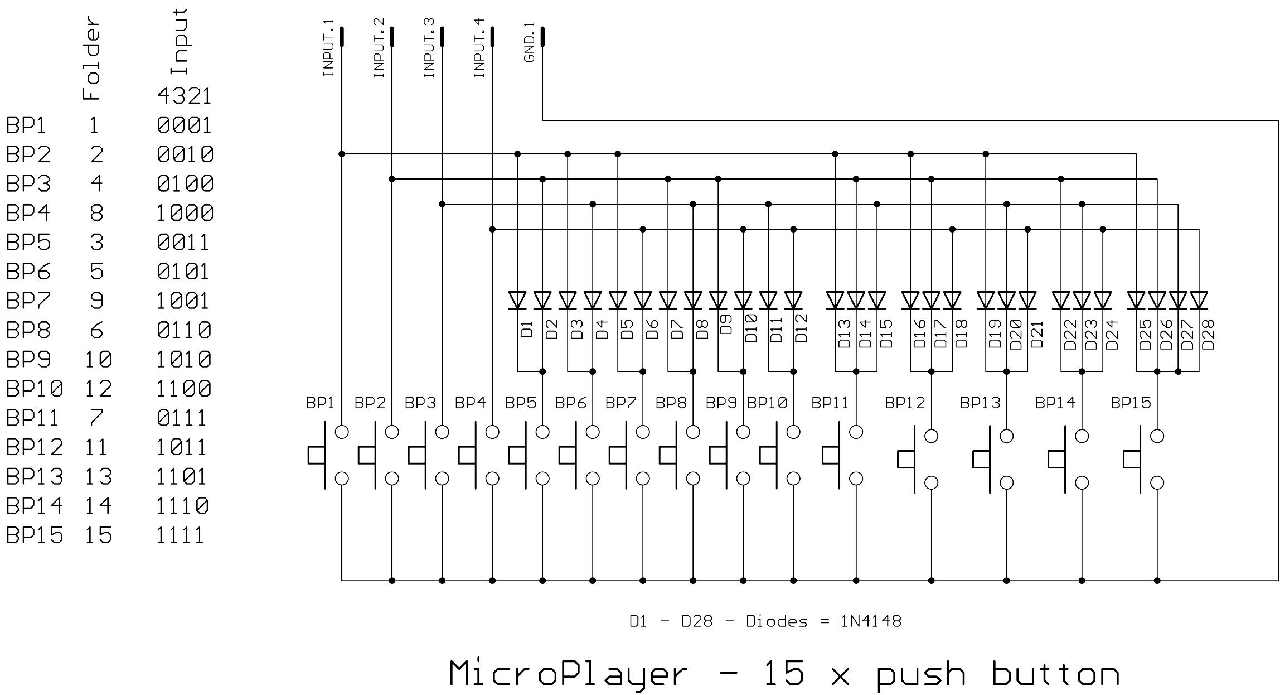
For up to 4 triggers, connections are direct. Beyond this, it is necessary to create combinations using diodes. The different inputs correspond to a binary representation of the folders to be triggered. You can also use the optional extension card.
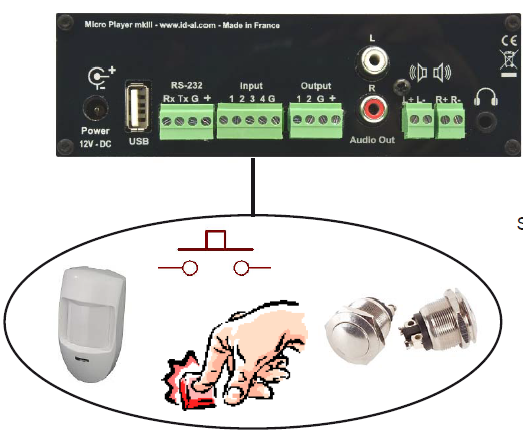
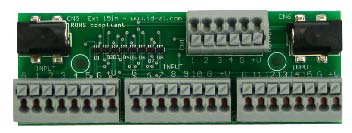
Optional extension card
Internal diagram of a player input
Example of connecting 15 inputs:
Output Connections
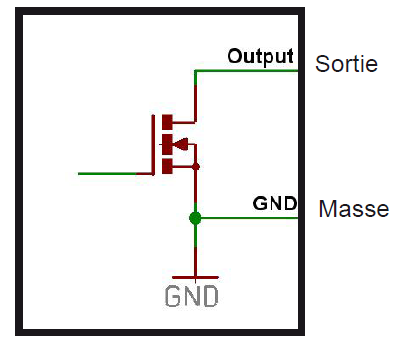
The MicroPlayer mkIII offers 2 electronic switching outputs implemented with MOSFET transistors, providing a switching capacity of up to 500mA per output.
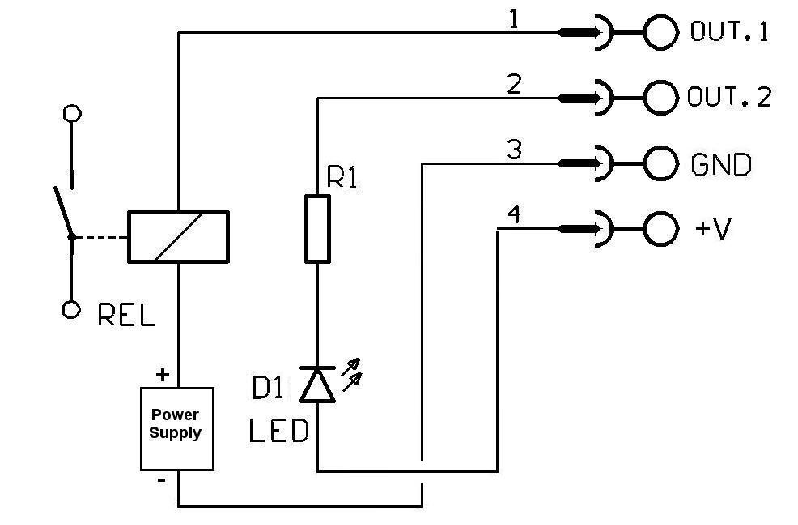
It is possible to connect LEDs, motors, relays, or any other compatible equipment.
Note: V+ is a pass-through of the input power supply. With a 12V power supply, V+ will also be 12V. The current provided cannot exceed 500mA.
Internal diagram of a player output
Example of connecting the 2 outputs
Switching characteristics:
- Max Drain-Source voltage: 20V
- Max Drain-Source current: 500mA (2A peak)
- Switched Drain-Source resistance: 0.1 Ohms
Was this article helpful?
That’s Great!
Thank you for your feedback
Sorry! We couldn't be helpful
Thank you for your feedback
Feedback sent
We appreciate your effort and will try to fix the article