 To start the software, double-click the Scheduler icon on the desktop.
Defining Project Properties
The Scheduler software allows you to configure project properties and add summary information before starting a project.
- In the File menu, select New Project (Ctrl+N). The Waves System Player Selection dialog box appears.
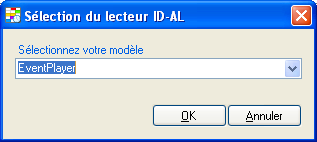
This dialog box allows you to select the hardware for which the project is intended, ensuring perfect compatibility between the created Scheduler project and the Waves System player used.
- Choose a Waves System player from the dropdown list Select Your Model.
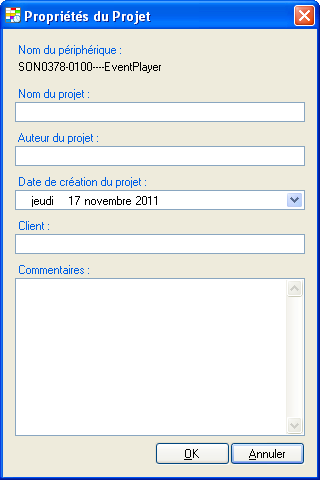
- Click OK. The Project Properties dialog box appears.
- Enter the necessary summary information to precisely identify your project when reopening it later.
- Click OK.
Using the "Project Properties" Dialog Box
This dialog box allows you to enter information about the project. These fields can remain empty or be modified at any time when they contain information.
| Element | Description |
|---|---|
| Device Name | Text field automatically generated based on the selected Waves System player type. |
| Project Name | Enter the name of the project. |
| Project Author | Enter the name of the person(s) who edited the project. |
| Creation Date | Enter the creation date of the project. |
| Client | Enter the name of the client for whom the project is intended. |
| Comments | Enter the identifying and describing information about the project. |
Opening Existing Projects
- In the File menu, select Open a Project File (Ctrl+O). The Open dialog box appears.
- Choose a drive and folder from the Look in dropdown list.
- Select a file in the search window or type a name in the File Name field.
- Choose a file type from the File Type dropdown list to limit the number of files displayed in the dialog box.
- Click Open.
Was this article helpful?
That’s Great!
Thank you for your feedback
Sorry! We couldn't be helpful
Thank you for your feedback
Feedback sent
We appreciate your effort and will try to fix the article