Both the Micro AMP 4 mkII and 4/2 have four headphone outputs, each with its own volume control. The Micro AMP 4 mkII has one audio input; the Micro AMP 4/2 has two inputs that can be selected independently for two headphone groups.
Before connecting the unit
- Install it in a dry, dust-free room.
- Do not install it directly against a wall.
- Before use, check that the mains voltage matches the voltage shown on the power supply rating plate.
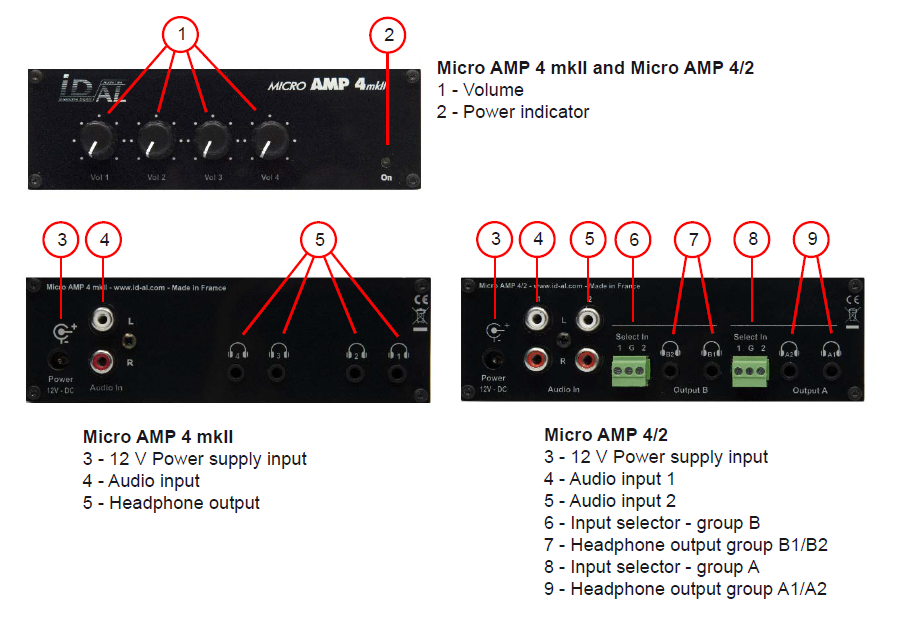
Micro AMP 4 mkII
- Connect the audio source to the RCA input.
- Connect the headphones to the four 3.5 mm outputs.
- Connect the 12 V DC power supply.
- Adjust each headphone output using its volume control.
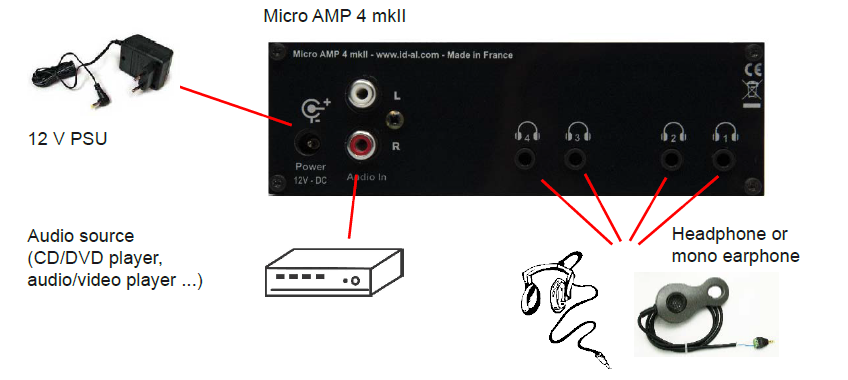
Each output has its own volume control.
Micro AMP 4/2
- Connect the audio sources to the Source 1 and Source 2 RCA inputs.
- Connect the headphones to the A1/A2 and B1/B2 group outputs.
- Connect the source selection buttons to the inputs provided for each group, following the markings on the unit.
- Connect the 12 V DC power supply.
- Select the source for each group and adjust each headphone output separately.
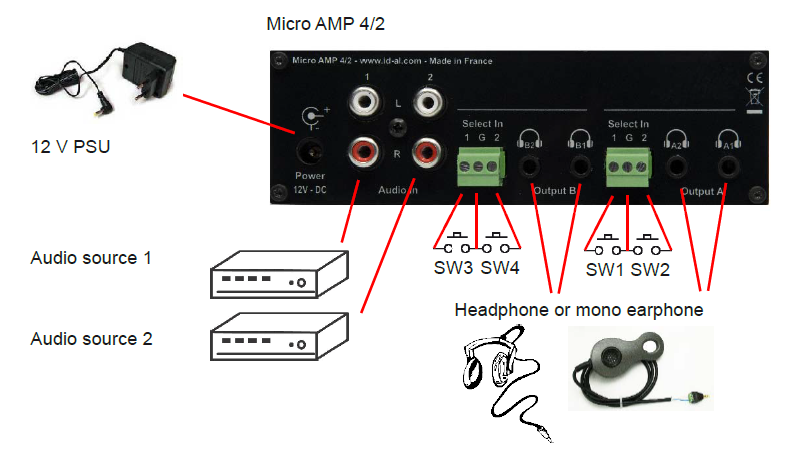
Each output has its own volume control.
If you use a regulated, filtered power supply or a battery, we recommend 12 V DC. The DC connector is 2.1 mm / 5.5 mm, centre-positive.
Was this article helpful?
That’s Great!
Thank you for your feedback
Sorry! We couldn't be helpful
Thank you for your feedback
Feedback sent
We appreciate your effort and will try to fix the article