This procedure explains how to start and configure your EVP380 for the first time.
- Plug the controller into the power outlet.
- Connect your controller to the local network.
- Connect a screen to the HDMI port.
- Insert batteries into the remote control.
- Point the remote control at the front of the controller and press ⓘ ℹ️.
- The IP address is displayed at the bottom right if the controller is on a DHCP network. You can then connect from a web browser on the network.
- Enter the IP in the address bar and log in from the login page with the username admin and password password.
- Press the Menu ? button on the remote control > System Settings > Network and enter the static IP of your controller.
Result
Your EVP380 is now operational and ready to use.
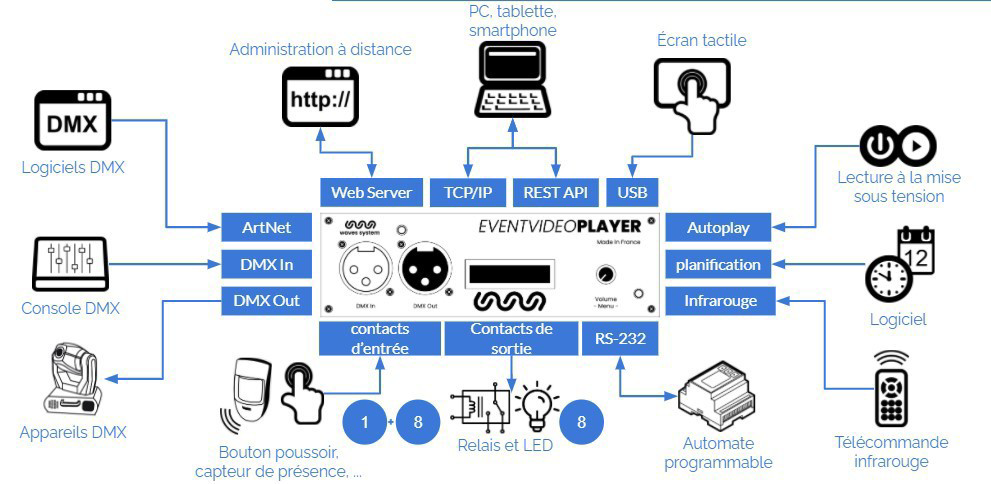
EVP380 Connection Diagram
The following diagram shows the connection possibilities offered by the EVP380 controller.
Connect only the peripherals that will be used.
Was this article helpful?
That’s Great!
Thank you for your feedback
Sorry! We couldn't be helpful
Thank you for your feedback
Feedback sent
We appreciate your effort and will try to fix the article